This DIY sweet tree is perfect for any occasion, whether it is being used as table decoration at a party or even a gift to someone for their birthday. It is very easy and cheap to make and a unique idea.
What you'll need:
- A pot to put your tree in
- A polystyrene ball
- 2x Ribbon (any colour, your preference)
- Something for the stem of the tree... in our case we used a wooden spoon
- Play-doh
- Sweets or chocolate of your choice
- Sellotape
- Fabric glue (optional)
- Tooth picks
- Scissors
- Bubble wrap or something you can use to help stabilise the spoon and keep it in place
- Felt (colour of your choice)
- Paperclip or something small and sharp to pierce chocolate (optional)
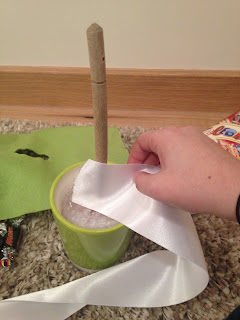
Step 1: Grab your Play-Doh (we used two pots of it but it depends how big your tree is going to be as this is the main element that holds the tree in place) and roll it up into a big ball. Once you have done this split the ball into two and mould it around the spoon end of the wooden spoon (instead of a spoon you can use a piece of wood or something similar). Then put it into your pot.
Step 2: It is now time to secure your spoon in the pot as the Play-Doh alone is not enough due to the weight of the ball and sweets that will go on top. For this we used bubblewrap. Roll it up and force it into the gaps between the Play-Doh and spoon and the pot to avoid movement.
Step 3: Now to start a bit of decorating. With one of the two colours of ribbon we need to cover the spoon so it no longer looks like a spoon. Put the end of the piece of ribbon at the bottom of the spoon and secure it with a piece of Sellotape, then continue wrapping it around until you reach the top. We used a little bit of fabric glue here to make it look a little bit more neat but this step is optional.
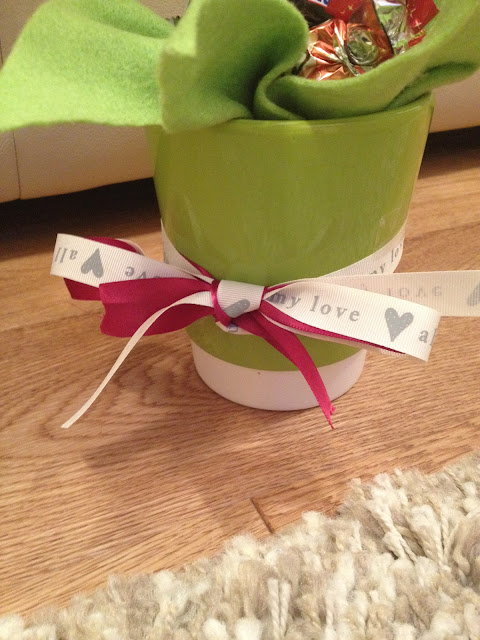
Step 4: Time to disguise the bubble wrap in the pot. We used a piece of green felt, which we would shape to look like leaves. The first step was to fold it into four and cut the centre corner out so we could put it over the spoon. We will do the folding later on, but this piece of fabric needs to go on before we put the ball on top.
Step 5: Time to put the ball on top. You will need to find the centre and make an indention as the spoon is not pointy enough to make it alone. Here we used some scissors after we found the perfect point to pierce and then put it on top of the spoon where it was pushed on until it was completely stable.
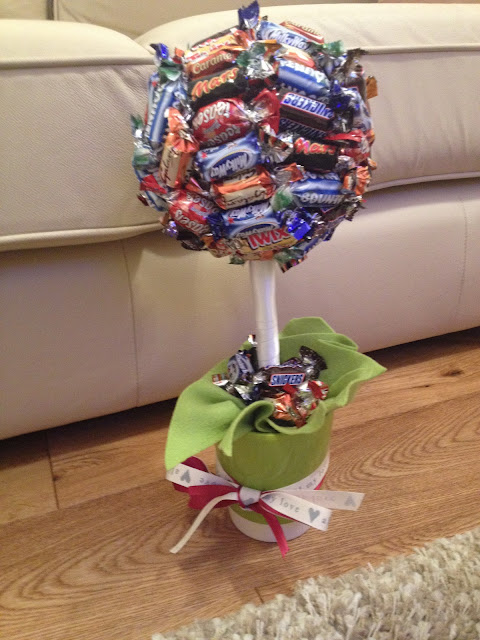
Step 6: Its sweetie time! Before you start, cut your toothpicks in threes and discard the centre piece (where both ends are blunt). Here we used a paperclip which we stretched to piece a hole in the chocolate for the toothpick. The blunt end then went into the chocolate and the sharp end into the ball. Now its time to get creative and place them wherever you want. We didn't do a particular order we just made sure that no chocolate alike where near each other.
Step 7: Finishing touches. Now all thats left is to mould the felt into leaves and then place the left over chocolate on top of them! We also added some other ribbon around the pot in a regular bow to add some more colour to it. This is optional but personally I think it makes it look much better!
You now have your very own chocolate/sweet tree!
Enjoy!